Send me an email

Visit my linked in page

This tool is published on

Gumroad

FBX Batch Exporter

The FBX Batch Exporter is a tool developed to help artists speed up their FBX-exporting-process in ‘Autodesk Maya’. It exports multiple objects into individual fbx-files with one click.

  • Tool Designer & Developer
  • Just me
  • 8 weeks
View my process

My Process

The steps I took to get to the final result

Learning & Practice

The first weeks of this project were spent practicing and learning. The first subjects were very programming related, like:

  • learning the Python language
  • learning how to make a program in Python
  • learning how to work with python in Maya (maya.cmds).

Afterwards, other subjects were studied, more related to the design and publishing side of tool development,like:

  • The creation of tool-briefs
  • Front-end creation with PySide, PyQT and QT designer
  • Creating Tool packages with an Installation help document and automatically creating a shelf button.

All of the subjects were learned through small test projects like the 'Black Jack Project' and the 'Renaming Tool'.

Interviews & Planning

Before the production of the FBX tool began, it was necessary to conduct interviews and research to find out the needs and requirements of the tool. Several artists were asked about their normal export routine; what they didn't like about their current routine and what they would like to see in or do with a new export tool. One artist even drew up a sketch of what he imagined the tool to look like.

With a clear vision of the goals, needs and audience for the tool, a tool-brief was made. The tool-brief had two big advantages for the production stage. Firstly, it improved the focus of the developer, in this case, me. Secondly, it offered people outside of the project a better insight into the project.

Preparation

Because of the size of the tool, it was very useful to document the functionality of the system with a flow-chart. The flow-chart clarified what all the options of the tool were and how user input could affect the outcome of the tool. Additionally, a wireframe was created for the user interface of the tool.

For the design of this wireframe, a lot of inspiration was taken from the native Maya tools and interfaces, in addition to the sketch provided by the artist. The tool is split into two tabs. One with just the basic options, all in view at the same time, and one with a scroll section of all the advanced settings. The goal in separating these tabs was to create a small easy tool that is easily navigatable and fast, eliminating any advanced options you might only have to check once.

Building

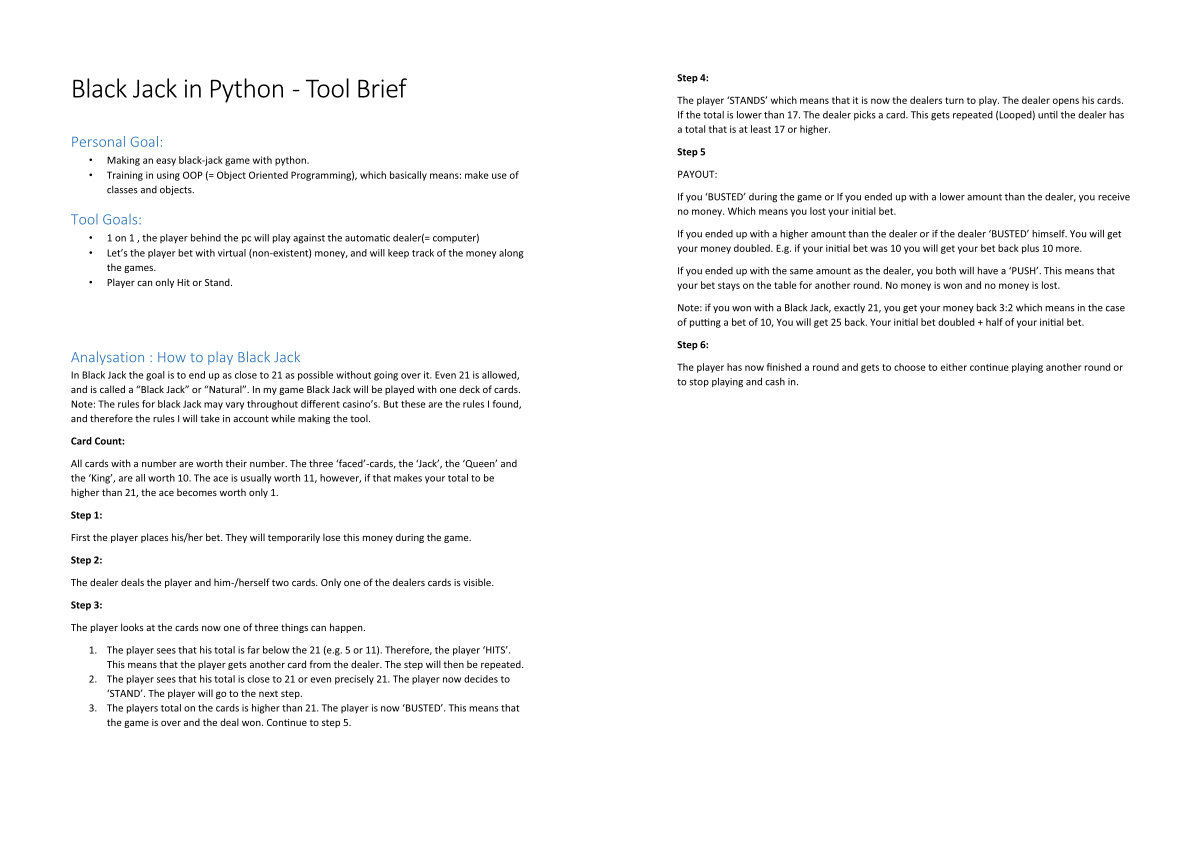
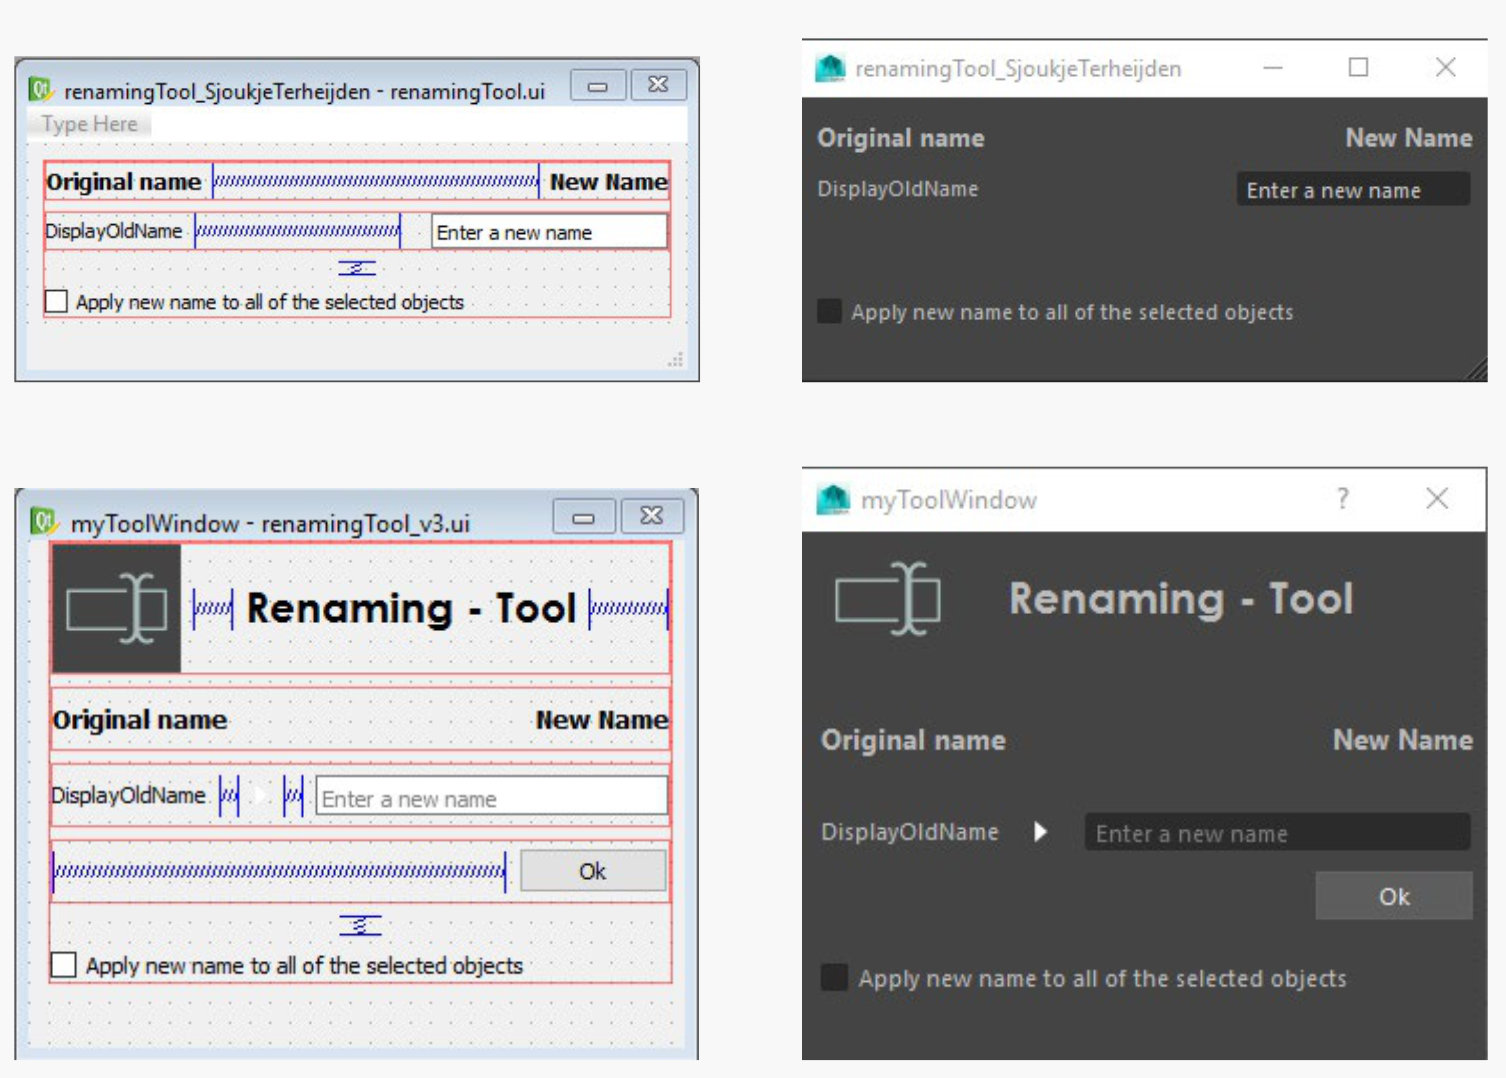
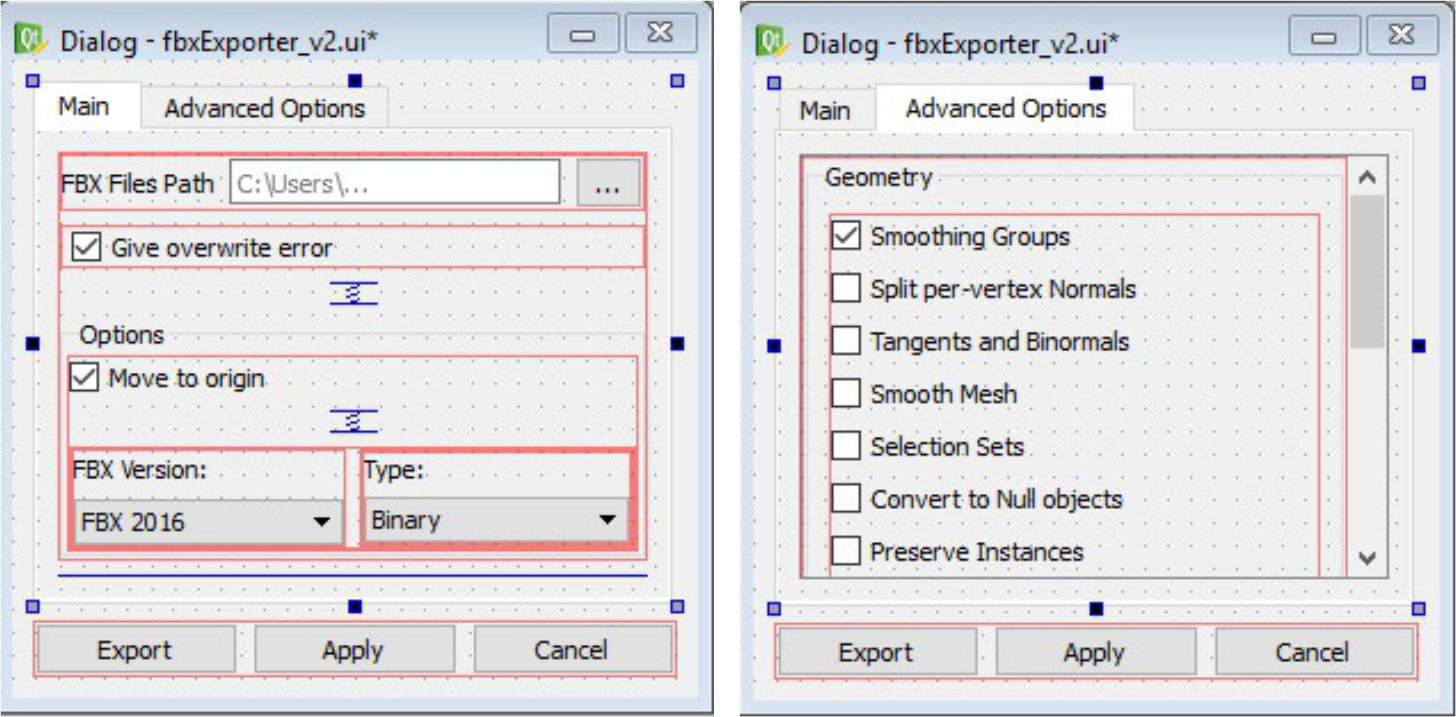
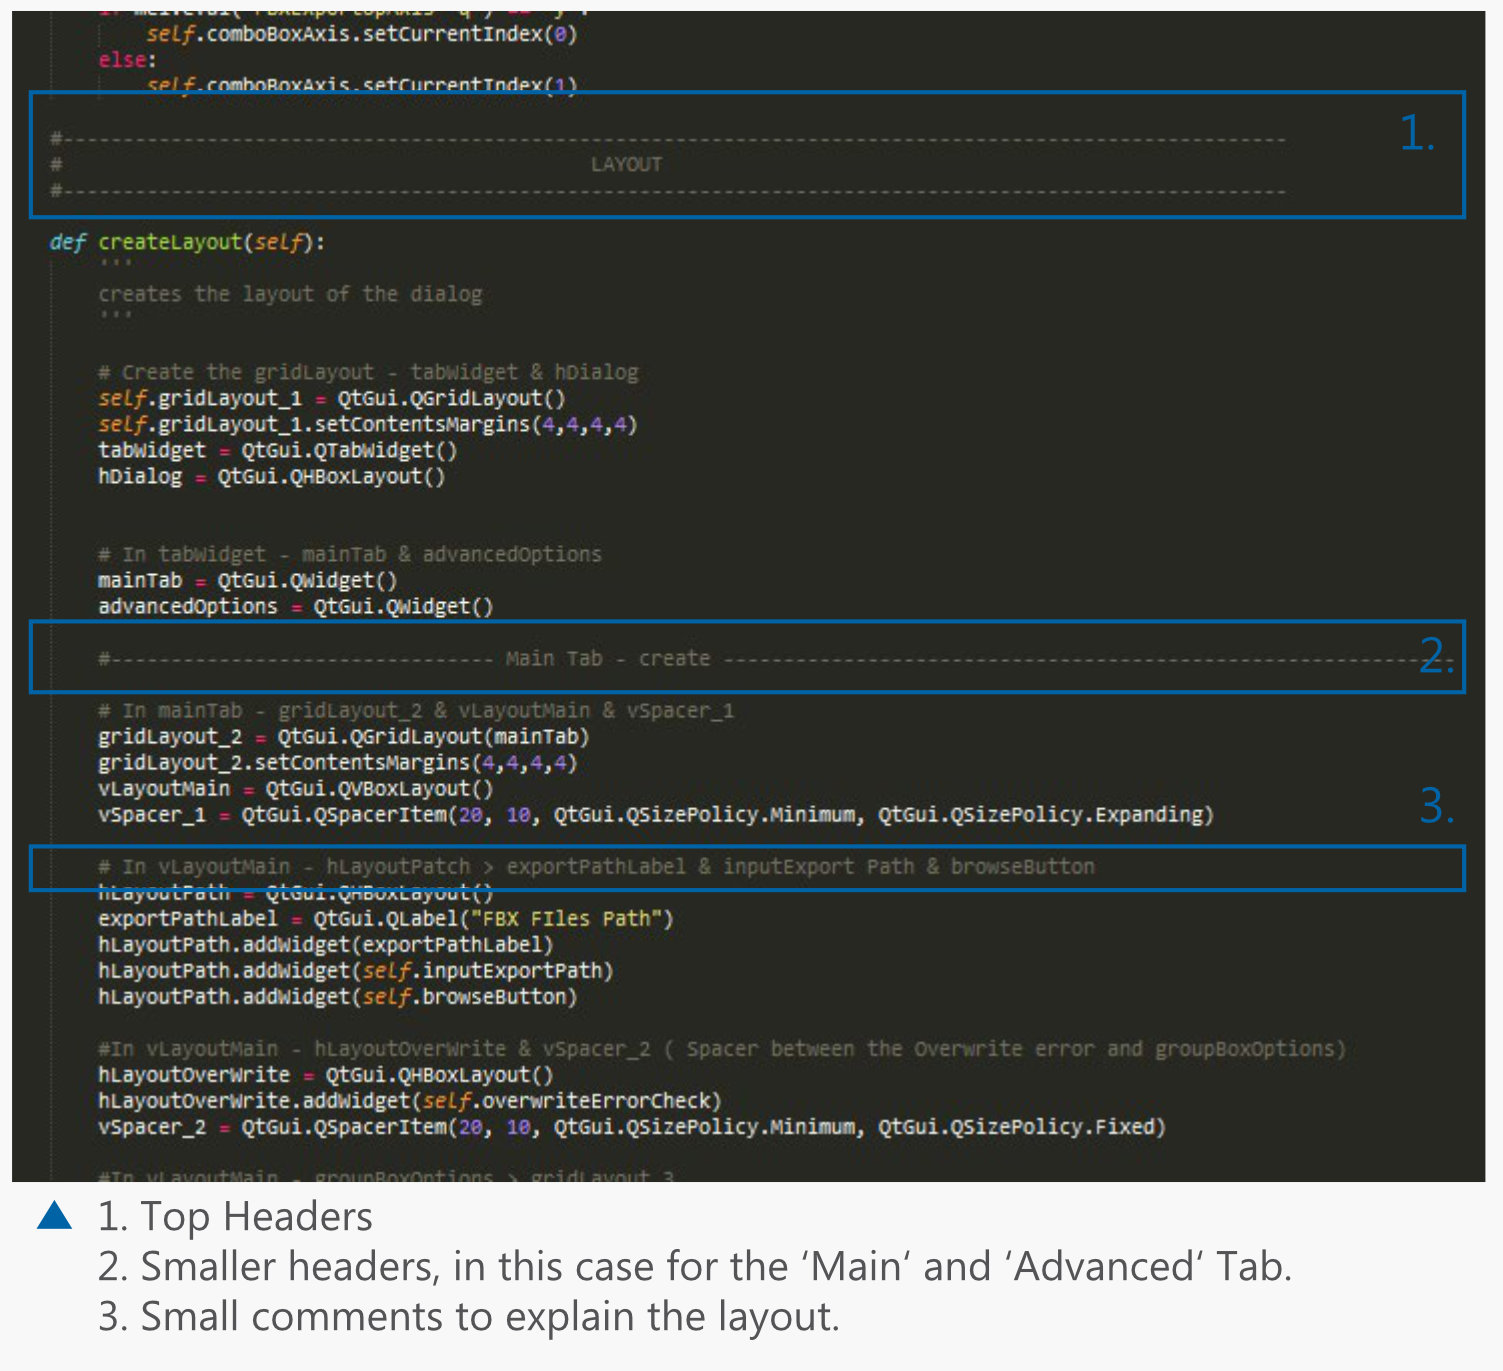
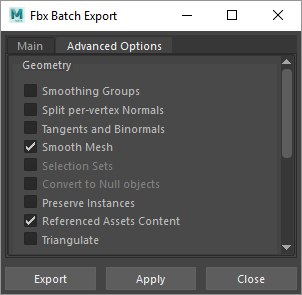
The building stage of the tool started by creating the User Interface. The first interface prototype was created inside of QT-designer. Unfortunately, it proved difficult to add functionality to the buttons of the prototype. In addition, QT-designer outputs a very ugly and big bunch of code. The decision was made to create the next prototype with hand-written code. The output of the QT-designer prototype was still used a lot as reference. Especially to see how to arrange widgets and how to build things like dropdowns, tabs and scroll sections.

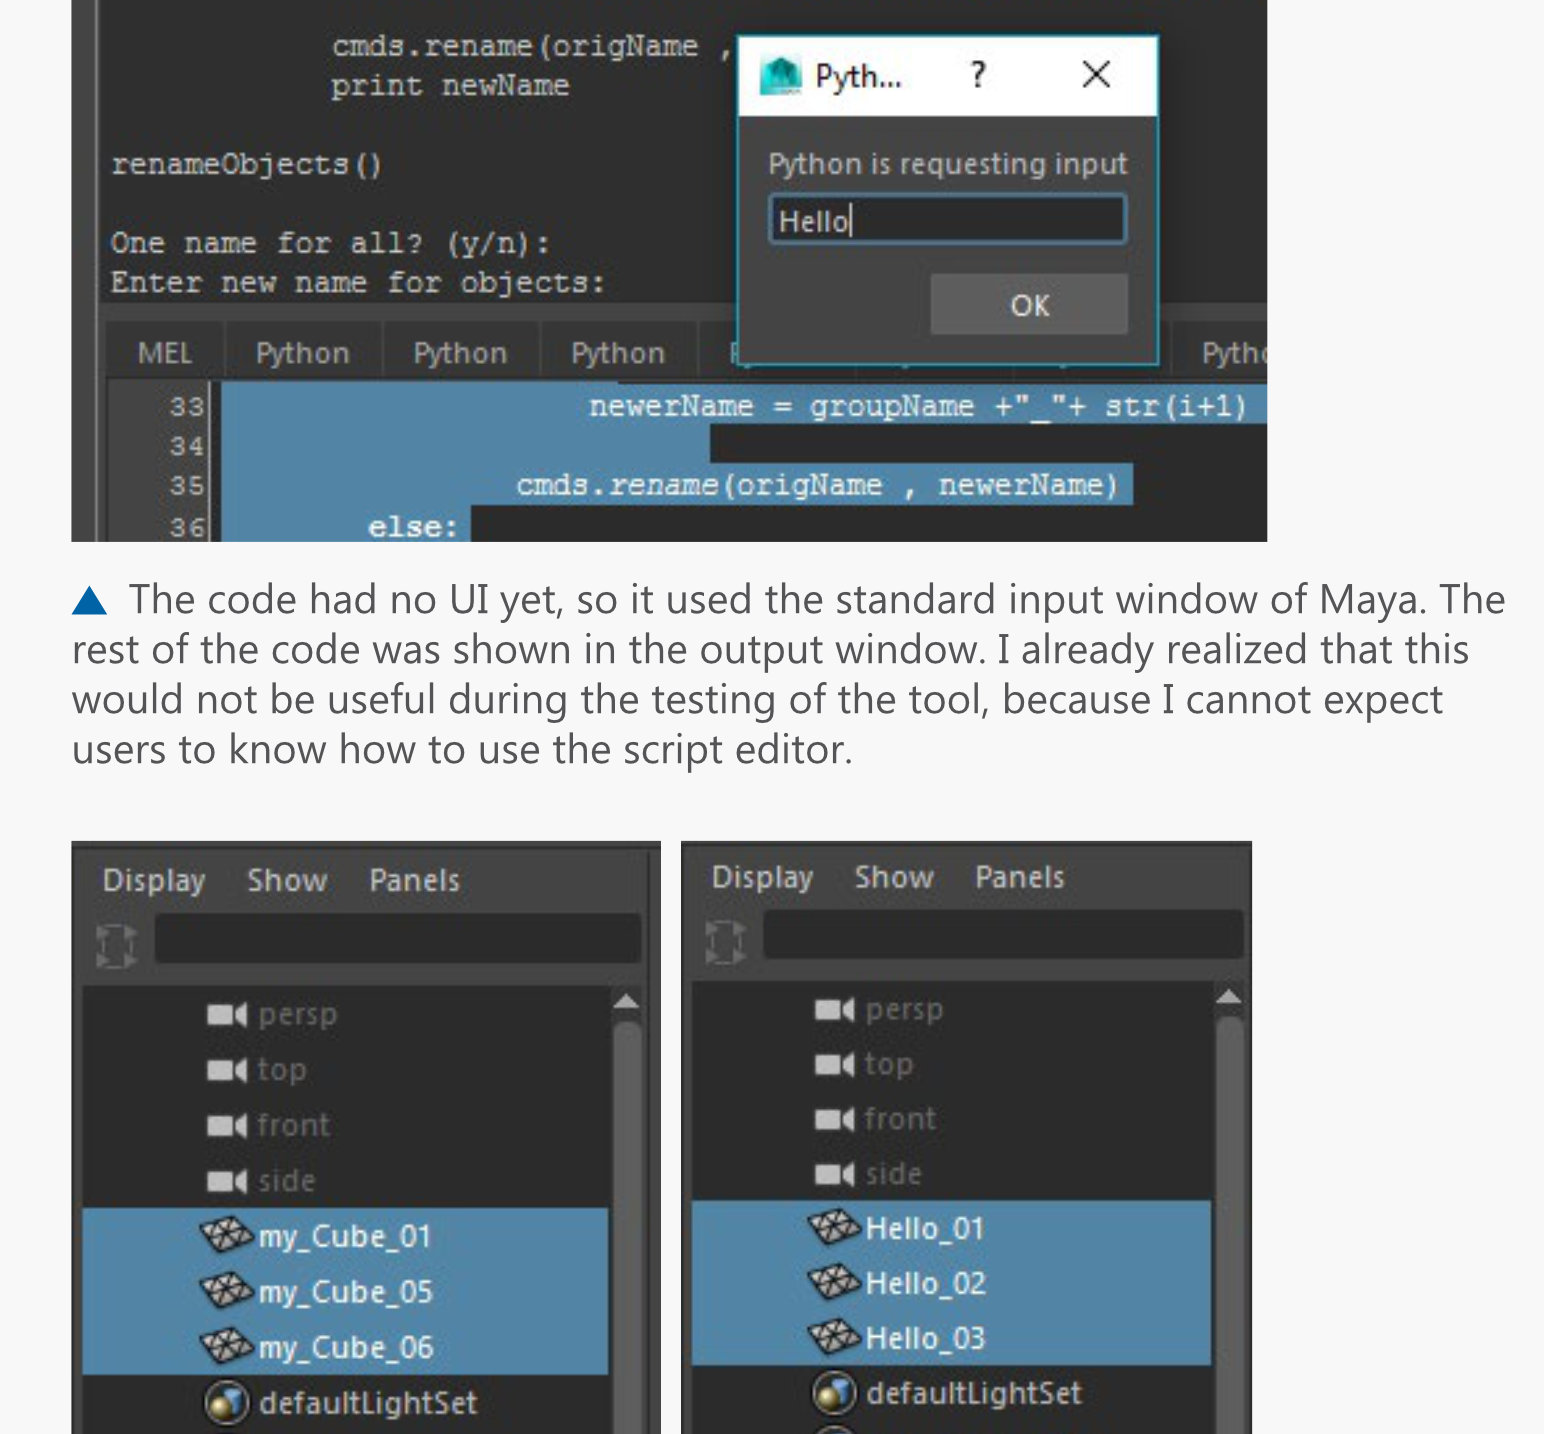
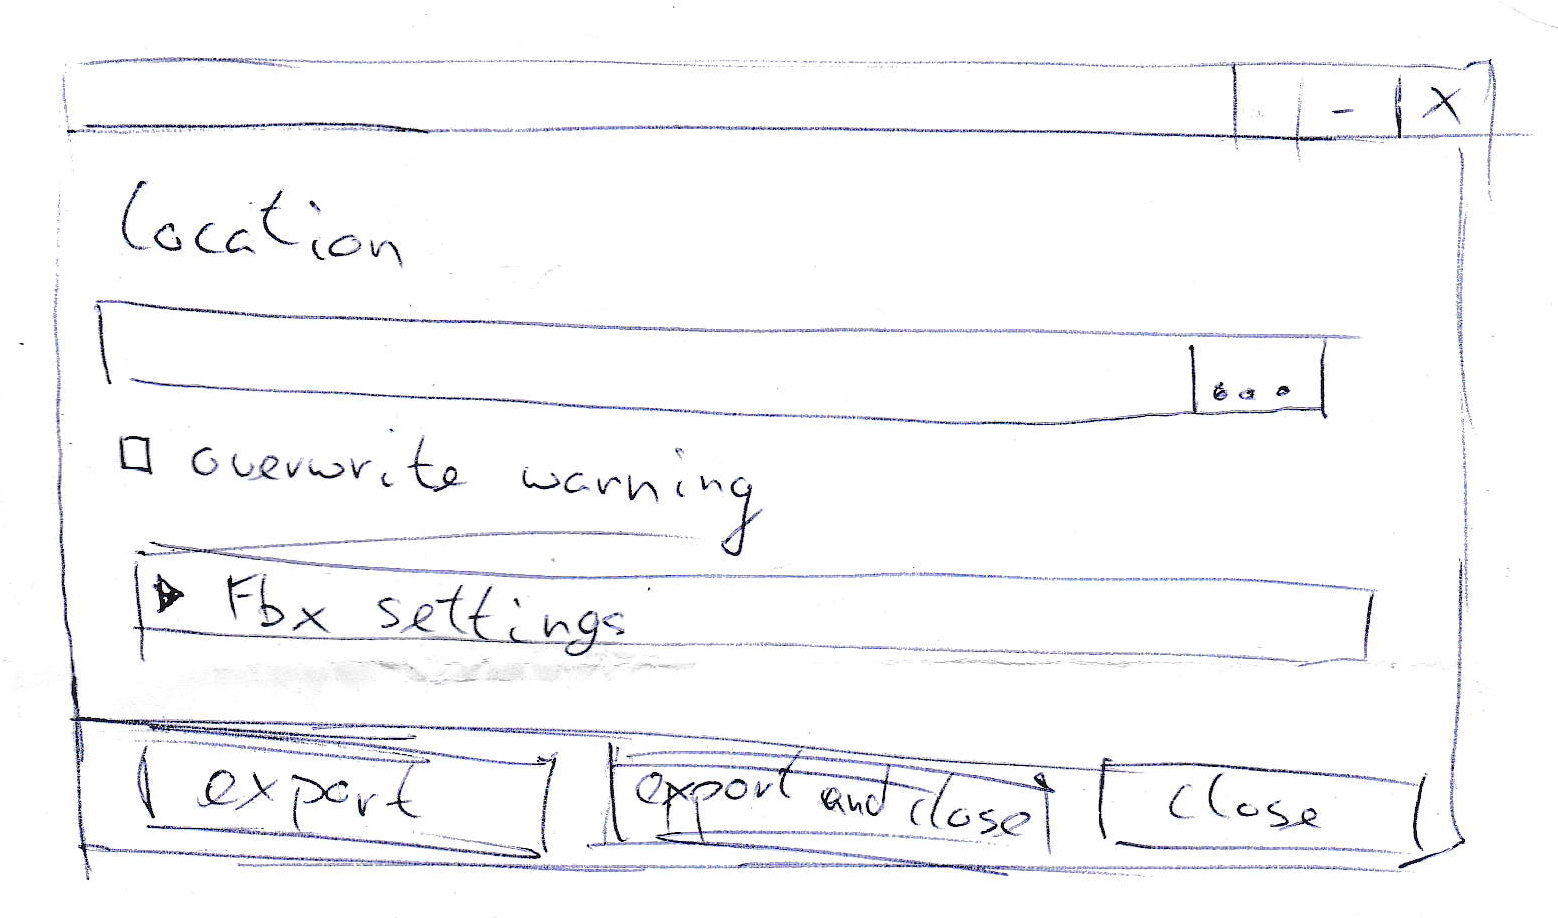
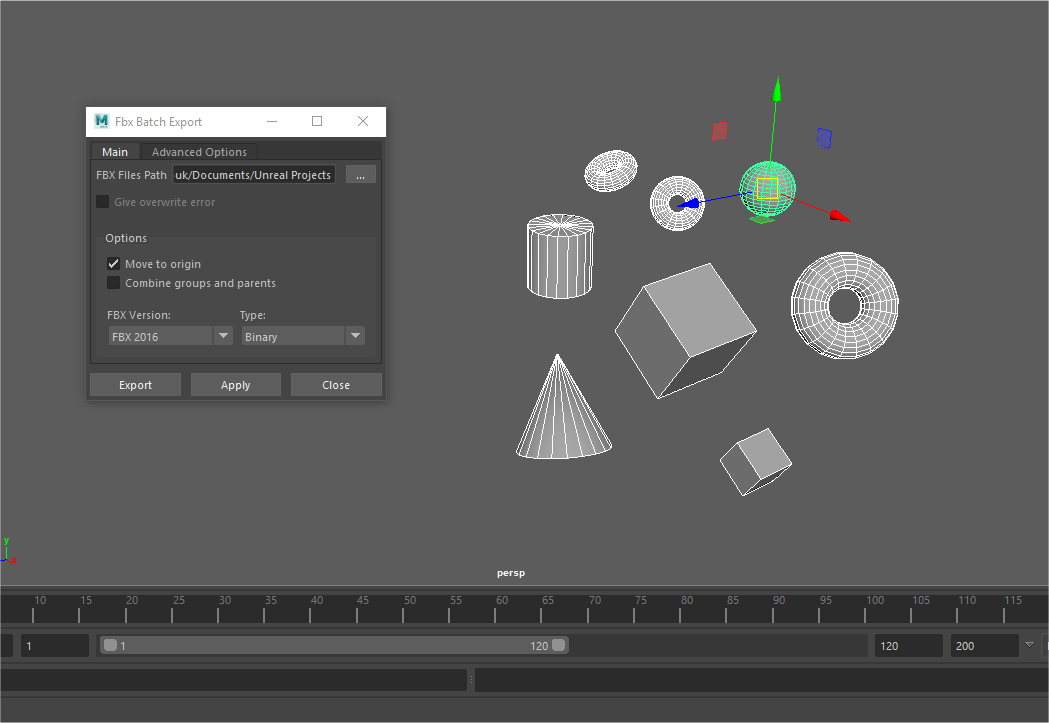
After the front-end was created, all that was left to do was filling in the blanks. Each option of the tool was thought out and created separately from the rest. For example, one option is 'move to origin': being able to export all the objects in the center of the grid, without moving them. To figure out how to make an option like that function automatically in code, the functionality of the option was first mimicked manually. Maya (almost) always outputs the code for any manual action performed. The Maya code output was used to create the code for each separate option. After the initial creation of an option, its code is tested and improved until it works correctly. Then the code is added to the other parts of the tool.

Reflection

Images and Videos of the end result of this project

The 'FBX Batch Exporter' was my first experience developing a tool as a technical artist. It was an entirely new and fun experience to learn a programming language; find and explore a problem that artists around me faced and build a tool that would help those artists have a quicker and more pleasant workflow.

The project was extra successful because of the planning, preparation and research that went into it. Mastering the language and environment in addition to researching the problem and setting up a tool brief, allowed me to develop with a goal and focus in mind. Choosing a problem that was frequent with artists, gave me a bigger audience and more opportunities to get feedback.